Alt-tags or alternate text are added to an image included in online documents and on webpages so that anyone using a screen reader to access the information will have an explanation of what this image is communicating. If an image cannot be displayed, the alt-tag will appear as text in its place. Writing an alt-tag is a bit of an art as the text you use to describe the image should help explain why the image is there.
Imagine you are sharing an image with a friend to cheer them up. You find a cute picture of a small orange kitten sitting on their hind legs with their front paws together. It looks like the kitten is praying. The kitten has large eyes and a sweet expression that looks like a smile. You send it to your friend with a message: "I hope your day gets better!" Now imagine your friend can't see the image and the alt-tag says "A cat." While the alt-tag does provide text about what is in the image, it does not convey the purpose or the reason why you included it with the message. Learning to write a good alt-tag might seem tricky so we have some tips to make it easier!
The Difference Between Alt-tag, Image Descriptions, and Captions
The descriptions below explain the difference between alt-tags, image descriptions, and captions. To be fully accessible, providing both alt-tag and image descriptions is recommended particularly for images or graphics that convey words or complex information. Captions are optional in most circumstances and should not be used in lieu of alt-tag and image descriptions.
- Alt-tag: a brief textual explanation of an image, used in the coding of digital graphics online and in digital files; alt-tag is not visible on websites unless the image does not appear
- Image Description: a detailed explanation of an image that provides textual access to visual content; most often used for digital graphics online and in digital files; it can be used as alt-tag in coding to provide access to more complete information
- Caption: a brief explanation that provides further information about an image; these do not need to focus on visual components and can be supplemental to any image
Example:
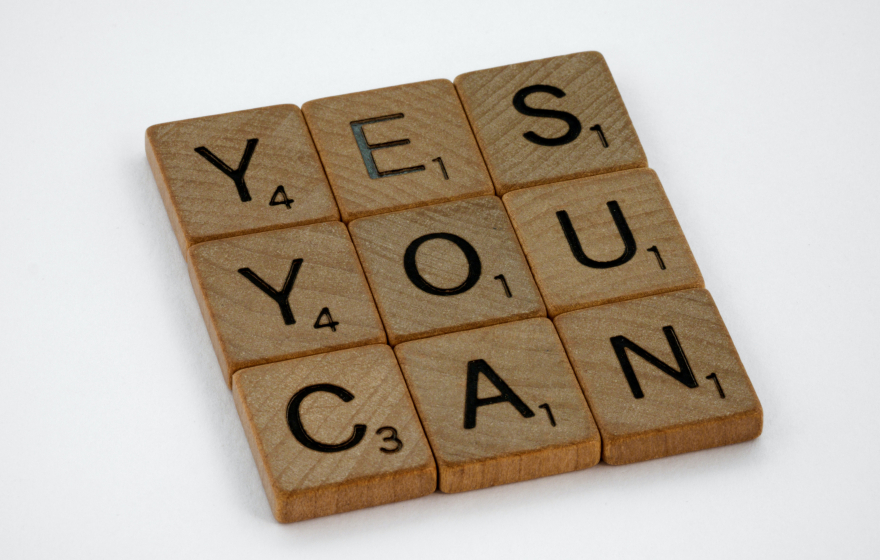
Photo by Brett Jordan on Unsplash
Alt-tag: Yes you can written in scrabble tiles.
Image Description: A motivational quote, YES YOU CAN, is displayed using scrabble tiles.
Caption: Yes! You can write Alt-tags
How to Compose an Alt-tag:
Most of the time, you will need to write alt-tag for each and every image you add to your learning documents; the exception is a purely decorative image, which does not need a text description. It's important that your alt-tag is clear and descriptive to effectively communicate the visual information in the image. Adapted from Step-by-Step Instructions for Writing Alt Text by University of South Carolina.
1. Examine the image closely. Think about everything that's happening in the image. What visual information is it conveying? What information would you not have if you could not see this image?
2. Consider information implied by the image beyond the objective visuals. Is the image implying a mood, feature, or activity not mentioned elsewhere on the screen where it will appear?
3. Don't begin with "Image of..." A screen reader will tell the person listening to your alt-text that this is an image. However, do mention if your visual is a particular type of image, such as an illustration, headshot, infographic, collage, etc.
4. Include any and all words in the image. It's best to avoid using images with text embedded in them. However, if words are part of your visual, you must include all of them in your alt text. As you can probably imagine, the more words in your image, the longer your alt text will have to be.
5. Determine if the layout is communicating meaning. For images like infographics, where the image's composition makes a difference in what's being communicated, you'll need to explain that layout and its meaning in your alt text.
Can I use this image?
Generally, a student or professor can use an image found on the internet for educational purposes under The Copyright Act if certain conditions are met: the material was legally posted by the copyright owner or with their consent; there is no "clearly visible notice" on the website prohibiting users from educational use of the content and the material is not protected by a digital lock. However, the image still requires an attribution statement and using Creative Commons licensed or public domain images is recommended. Using Creative Commons and public domain images and providing appropriate attributions provides an opportunity to model ethical behaviour (not stealing images from the internet) and giving credit to others for their work (academic integrity).
What is Creative Commons?
When an author creates a work, Canadian law automatically grants them full “copyright” over their work. This means that no one may copy their work or make changes to it except with the author’s express permission or in accordance with the user rights granted by the Copyright Act (e.g., fair dealing). If you want to use a work in a way that doesn’t qualify as a user right, you can only use the work as permitted by the copyright owner. The granting of permission is referred to as “licensing.” Some copyright holders restrict all rights to their work and permission is required to use their work. Others, however, proactively offer their work to the public on standard terms that allow anyone to use their work so long as certain terms and restrictions are complied with.
Creative Commons licenses are a prominent example of this proactive licensing. Creative Commons is a non-profit organization whose mandate is to make it easier for creators to share their work and/or build upon the works of others consistent with the rules of copyright. They have created standard, easy to use and understand copyright licenses that anyone can apply to their work to allow others to share, remix, or use the work without having to contact the copyright owner to ask for permission. There are several Creative Commons licenses, each with a different level of use restrictions. Creative Commons licenses are not an alternative or exception to copyright, they are one way for copyright owners to distribute their work within the copyright framework.
REFERENCES
Sheridan College. (2021). Copyright basics: Materials on the web. https://sheridancollege.libguides.com/c.php?g=703823&p=5004722#s-lib-ct…;
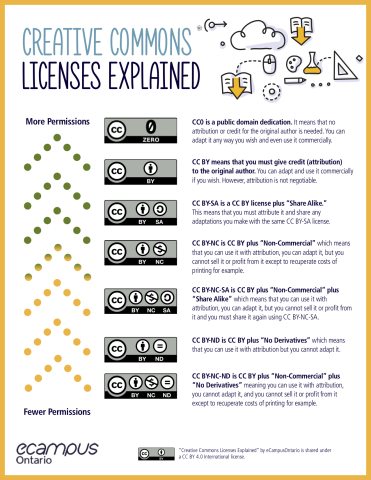
Understanding the Different Creative Commons Licenses
Creative Commons offers six different licenses that allow copyright holders to apply different restrictions to how their work may be reused. When using a specific CC-licensed work, it is important to pay attention to the CC license and its restrictions. All Creative Commons licenses require attribution.
Giving Attribution
When you use an image with a Creative Commons license, you have to give credit or attribute it in a particular way. Attributing means identifying what the work is: who made it, where it is from, along with what license it is used under. The acronym TASL can help us remember what to include:
- Title of the image
- Author or creator of the image
- Source of the image. Where is it from?
- The license of the image
In some cases, such as with Creative Common Zero licenses on image collections, there may be a suggested attribution statement that you can copy.
Image Optimization
Image display size refers to the length and width of your image, usually stated in a number of pixels. In Blackboard, the better image display size is a width of 400 pixels. The image file size is stated in Kilobytes (KB) or Megabytes (MB). A better image file size is less than 1 MB, preferably less than 500 KB. A smaller file size means the image will load faster. This can improve your students’ experience with your materials if they have limited internet access. Another aspect is the image file type. Generally, choose files in JPG or PNG format as these load faster as well. An image that is a JPG, 400 pixels wide, and less than 500 KB, is the better choice.
Loading please wait by Jan Persiel on Flickr
So, what if you have the perfect image but it is too large? The easiest step is to reduce the pixel size by resizing the image. This will also reduce the image file size. You can use the Photo software included with Windows or on your Mac or use an online image reducer. We also recommend BeFunky, a free online photo editor, or Optimizilla, a free online photo compressor.
Resources
There is more information on copyright and creative commons licensing on the Open Education Resources (OER) page.
Links to creative commons licensed image collections are available on the Better Images page.